Booking Products From Linked Room Manager Accounts |

|

|

|

|
|
Booking Products From Linked Room Manager Accounts |

|

|

|

|
Booking Products From Linked Room Manager Accounts |

|

|

|

|
|
Booking Products From Linked Room Manager Accounts |

|

|

|

|
|
|
||
If you are managing several properties you will need multiple Room Manager accounts.
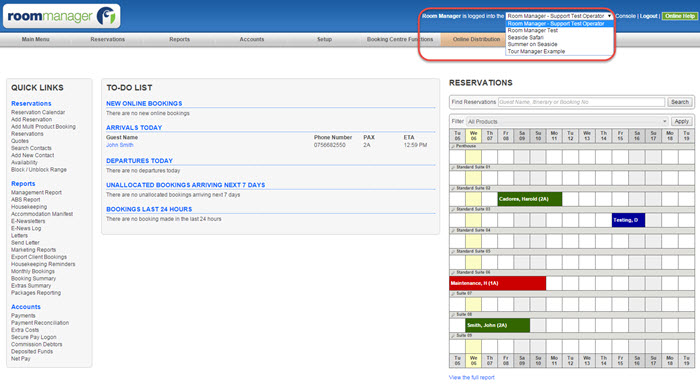
We can link your Room Manager accounts together to allow easy access to all your consoles. This will let you switch between them with just one click!

You will also be able to book various products using the same booking screen. This will ensure that bookings from various Room Manager accounts are included in one itinerary.
To see how it works follow the steps below:
1. Make your first booking as usual, enter the guest's details and click on "Make Booking & Payments" button. Record the payment and click Save Changes and Payment button.
Important: All payments need to be recorded individually against each booking.
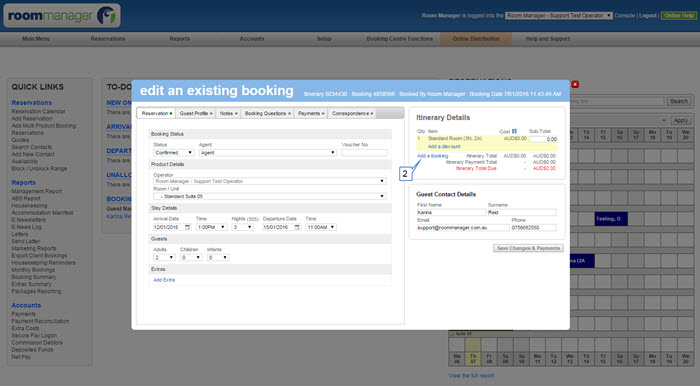
2. Re-open the original booking. Under "Itinerary Details" click on Add a Booking" link

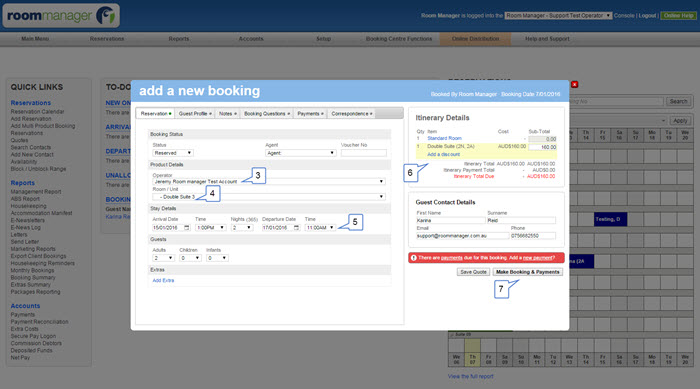
3. Select another property you wish to book - the Product Details drop down list will show you all properties your current account is linked to.
4. Select the room from the second drop down list
5. Choose the correct date range
Once the room is allocated, your "Itinerary Details" will be updated with the additional entry
6. Record the payment for this booking (note: you can only record payments for individual bookings)
7. Click on "Make Booking & Payment" button to save your 2nd booking. If you haven't recorded a payment, click Save Changes & Payments to continue.
You can continue to add more bookings the same way.

8. All bookings made against the same itinerary will be displayed under "Itinerary Details" section
9. You can switch between bookings by clicking in the Item links - remember to save changes before you move to another booking
10. Itinerary total amount (total cost of all bookings) will be displayed here
11. To hide cancelled bookings from the list click on this link (cancelled bookings are shown as crossed out)
